In the vast ocean of operating systems, one simply cannot afford to have multiple flash drives for every operating system out there. So, is there a way to put multiple ISOs in a single flash drive and boot using the same? Yes, there is and it’s quite easy and simple.
For Windows OS, these multiboot USB disks can be created using a popular tool known as Ventoy. There’s another tool called WinSetupFromUSB that can also be used to do the same, but Ventoy is a lot easier to put multiple ISOs in one USB disk.

Readying Your USB Disk Drive
You can put multiple versions of Windows and multiple Linux distros in the same bootable disk. Ventoy is especially helpful for Linux users who have to deal with various distributions each having its own set of features.
Before proceeding, if you don’t have the ISO files for Windows OS, here’show to download Windows 11/10/8.1/7 ISO files legally. Apart from this, if you’re new to Linux and don’t know the distro choices, you might want to check out ourbest Linux distrosarticle.

In case, you are searching for some bootable USB tools, here aresome suggestions.
Create Multiboot USB Disk in Windows Using Ventoy
Considering that you have already downloaded the required ISOs and a 16GB USB flash drive ready, here are the steps that you need to follow to create a multiboot USB disk in Windows using Ventoy.
- Head over to the officialVentoy GitHub releases pageand download the Ventoy Windows zip file.
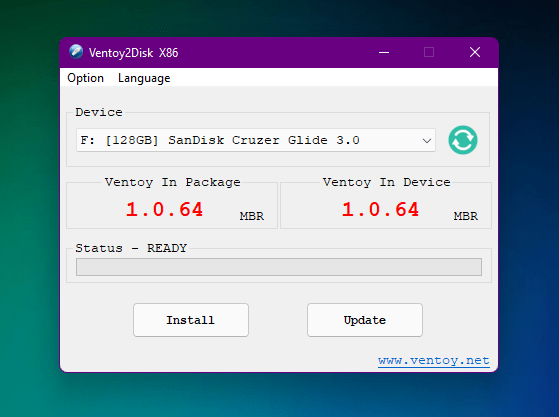
Insert your USB disk drive. Now, Extract the zip file, head over to the extracted folder and find and double-click on the “Ventoy2disk.exe” file to start Ventoy.
Once Ventoy starts, you should now see your USB drive listed. If not, select the USB drive that you want to use from the list and click on the “Install” button.
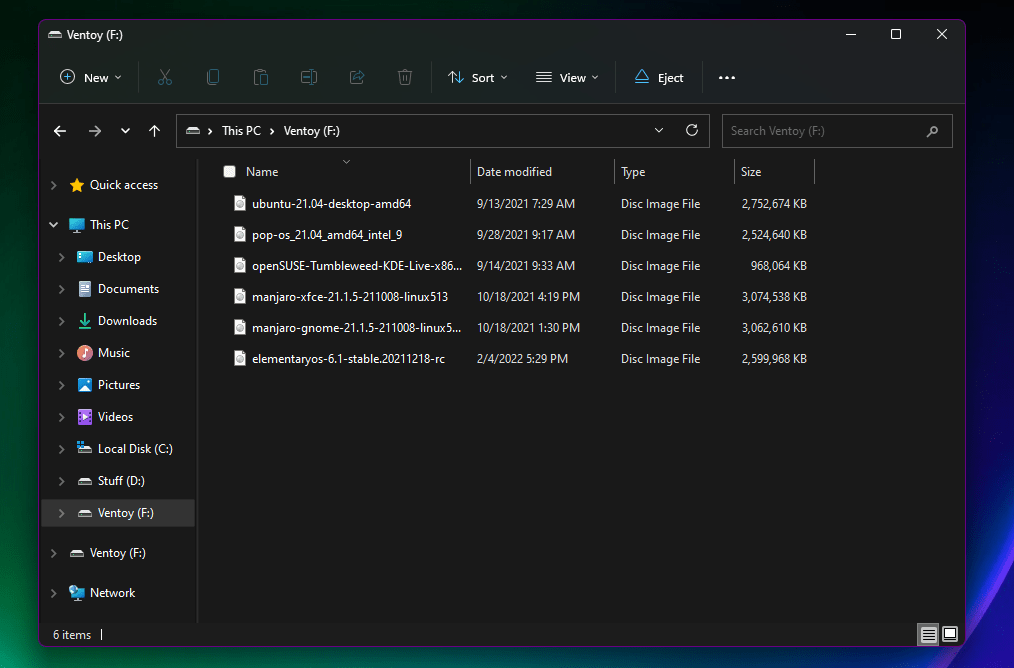
- Ventoy will be installed on your USB drive. Now all you need to do is copy all the ISOs to the drive where you installed Ventoy, and your multiboot USB will be ready.
And that’s how you can set up a multiboot USB drive using Ventoy. Now, all you need to do is select the USB drive in boot options. From Ventoy’s menu select the ISO that you want to boot from, and voila!

Using WinSetupFromUSB To Create A Multiboot Drive
1. DownloadWinSetupFromUSB. Extract this file.
2. Connect the flash drive to your computer.
Open WinSetupFromUSB. Open the 32-bit and 64-bit versions according to your OS. It will work without any installation.
ensure your flash drive is listed and selected in the drop-down menu. ClickRefresh, if it is not on the list.
5. TickAuto format it with FBinst.
Note: You have to tick this option only for the first ISO installation. Choose FAT32 if your computer is set to boot using UEFI mode or if UEFI sounds strange to your ears. Else, go with the NTFS option.
6. ClickAdvanced options.
Tick theCustom menu names for the Vista/7/8/Server Sourcecheckbox. Click the Cross (X) button to exit Advanced Options.
To add the ISO file for your multiboot USB, tick the checkbox corresponding to OS under Add to USB disk subheading. For example, I am using the Windows 8.1 ISO.
Note: If the size of your ISO is larger than 4 Gb, it will show a message to split the file into parts. This is because you’ve chosen the FAT32 option. Click OK.
Also, note that the software doesn’t support different variants of the ISOs, i.e., you cannot have a 32-bit OS and a 64-bit OS at the same time.
ClickGO. A data deletion warning message will be displayed. This is because you’ve chosen to format the flash drive. ClickYes.
Another warning message will be displayed telling you that all the partitions will be erased. ClickYes.
Next, it will ask for the folder name. Type the desired one in 30 seconds or it’ll auto select. ClickOk.
It will ask for the boot menu name. This will appear when you run the multiboot USB on some PC and choose an operating system. Type your desired name like Windows 8.1 64-bit. ClickOk.
13. The process will take a few minutes to finish.
14. Click Exit to Finish.
How to add the second ISO file in the Multiboot USB Disk?
Follow the same process to add more ISO files.
What to do after making your multiboot USB?
Now that you have your multiboot USB up and running, it’s time to see the action. Plug the flash drive into your computer and set the boot device to USB. Most desktops and laptops have a dedicated key to trigger the boot menu. After the multiboot USB loads, choose the desired operating system from the list.
So, this was the method to create a multiboot USB flash drive that allows you to choose between multiple operating systems at a time. Use the method to put a 32-bit and 64-bit version of the same OS in one bootable media. We’d highly recommend you use Ventoy as the process using the same is way easier than the WinSetupFromUSB. Keep the latter as a backup.
If you have something to add, tell us in the comments below.
